Asset Group Layout
Lay out the group’s assets to scale on a floor plan, so simulations and analyses reflect how the line is really arranged on the shop floor.
Open the Layout tab
Open the asset group and select the Layout tab. Any layouts that already exist for the group are listed here.
- Search. Filter the list by layout name.
- Created by. Show layouts created by anyone, or only your own.
- Add. Create a new layout and open it in the editor.
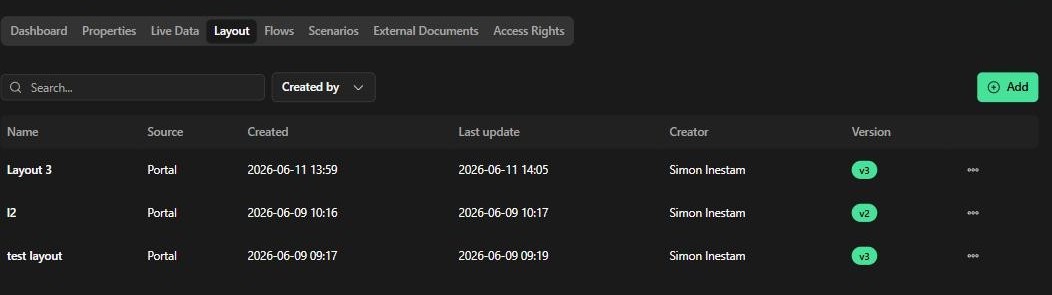
The Layout tab: existing layouts with their source, dates, creator and version, plus search, the Created-by filter and the Add button.
Build the layout
Opening or adding a layout launches the editor: a grid measured in metres, with the size and asset controls down the left side. The indicator next to the layout name shows the save state — the editor saves your work automatically as a draft, so you will see it move between Saving, Unsaved changes and Saved as you work.
Note that the spatial relationships between assets are factored into the calculations.
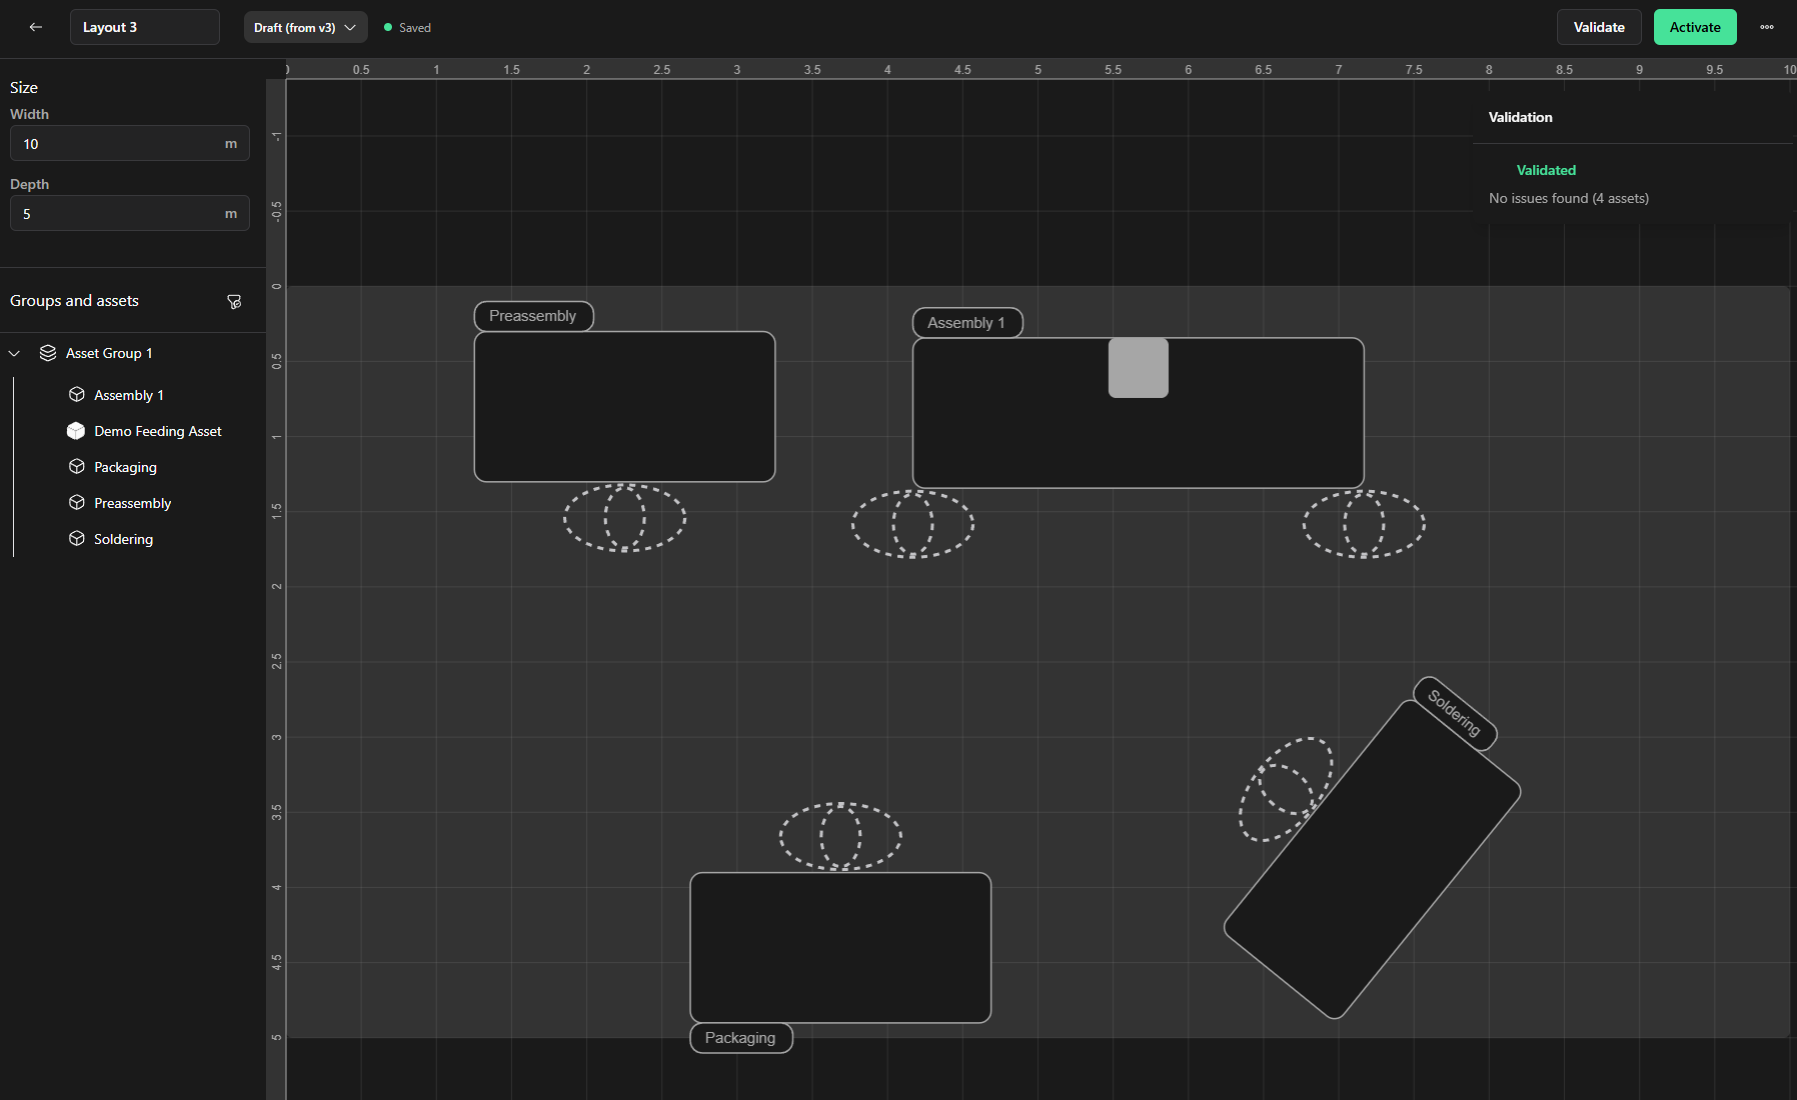
The editor: the Size panel and the group’s assets on the left, and the metre grid where assets are placed.
Set the floor size
In the Size panel set the area the layout covers:
- Width (m). The width of the floor area, in metres.
- Depth (m). The depth of the floor area, in metres.
Place assets
The Groups and assets list on the left holds the assets connected to the group. Drag an asset from the list onto the grey grid to place it. Use the filter control above the list to switch between showing only the current group and showing the full structure tree, so you can pull in assets from elsewhere when you need them. An asset that is already on the grid is shown as unavailable in the list, so you do not place it twice.
Position and inspect an asset
Click a placed asset to select it. A handle appears so you can rotate it on the grid, and its details open in the panel on the right:
- Dimensions. The asset’s Width, Height and Depth in metres.
- Tasks. For a standard asset, the tasks it performs, each with its type and cycle time and a bar showing its share of the total.
- Buffer capacity. For a feeding asset, its minimum and maximum buffer sizes instead of tasks.
- Delete. The trash icon removes the asset from the layout.
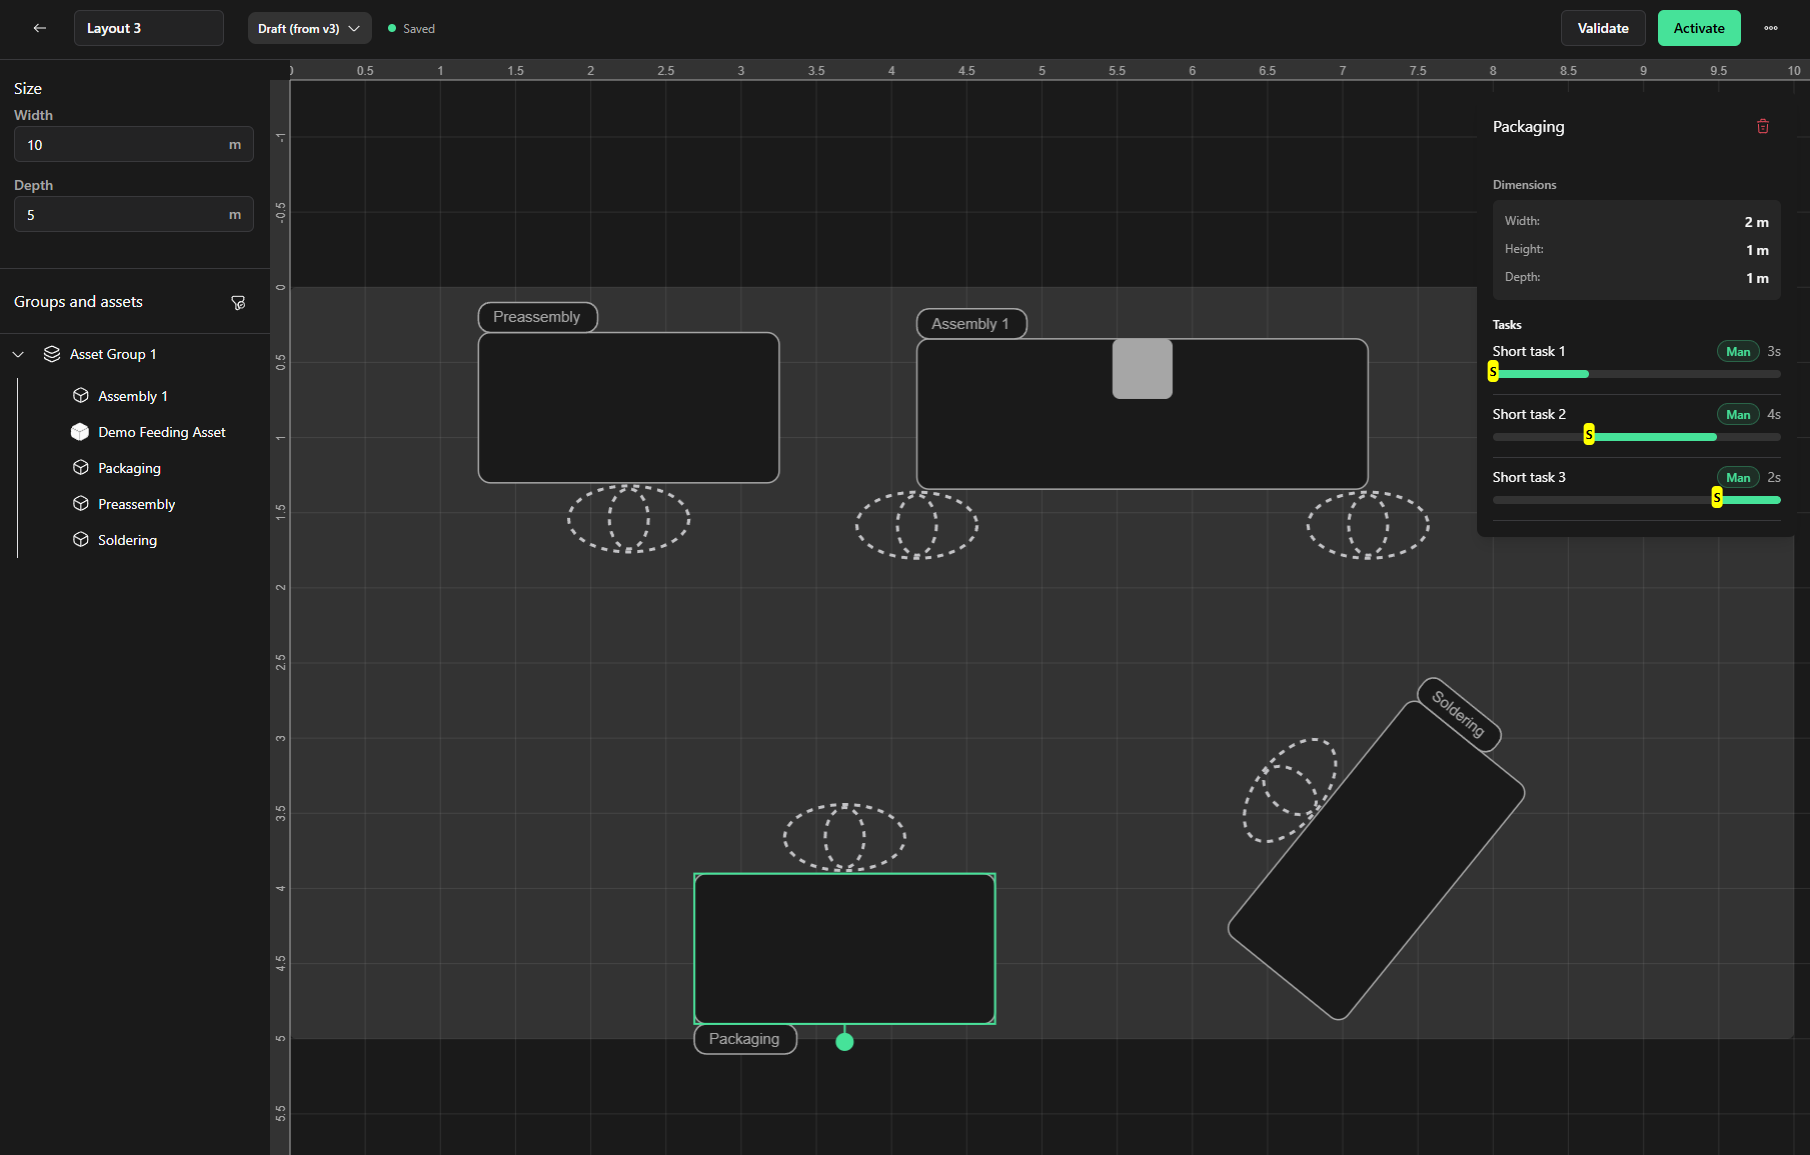
Selecting an asset reveals its rotate handle and opens the detail panel on the right, showing its dimensions and tasks.
Validate the layout
Click Validate (top right) to check the draft. The result opens in a panel on the right. A clean layout reports Validated — No issues found with the number of assets checked.

Activate the layout
When the layout is finished and valid, click Activate (top right) to make it the group’s active layout. Activation is only available on a draft. Once activated, the layout is published as a numbered version and becomes the plan the group uses.
NOTE
Only a layout that has been Activated becomes the group’s working plan and is available to downstream features. While you are editing, your changes live in a draft
Versions and drafts
After a layout is activated, it carries a version number (v1, v2, …). Editing an activated layout does not change that published version: the editor automatically creates a new draft from it. The draft saves automatically as you work, and activating it publishes the next version.
Use the version dropdown next to the layout name to switch between the draft and any earlier activated versions. The layout list also shows a small edit marker next to the version badge when an activated layout has an in-progress draft.

The version dropdown beside the layout name switches between the current draft and earlier activated versions.
Was this article helpful?
That’s Great!
Thank you for your feedback
Sorry! We couldn't be helpful
Thank you for your feedback
Feedback sent
We appreciate your effort and will try to fix the article